The Recipe Console is the primary module for performing image analysis in Aivia. You can select a recipe to run and modify detection parameters to optimize the analysis outcome. You can save the analysis parameters to the recipe and re-use them for future analyses.
Launch the Recipe Console
The Recipe Console should be displayed by default when you first launch Aivia. You can find the Recipe Console tab in the Analysis Panel.
Manage recipes
You can load, save and delete a recipe using the toolbar to the right of the recipe selector. There are five options:
 Save Recipe
Saves the current recipe and settings to a file Load Recipe
Loads a recipe from a file; you may only load recipes that are compatible with your configuration of Aivia Delete Recipe
Removes the current recipe from the recipe list and the Recipe Console; this will not delete your recipe from its file Reload Recipe
Reloads the current recipe back to its previously saved state Restore Standard Recipes
Restores the standard recipes that come with your installation of Aivia and removes all other recipes from the Recipe Console; this does not delete recipes from their files
On this page:
Select recipe
To select a recipe, click on the Recipe dropdown menu in the top left corner of the Recipe Console interface. The dropdown menu contains all the recipes that are pre-installed with your copy of Aivia as well as any additional recipes that you have saved to files.
A full list of the recipes that are available in Aivia is shown on the right.
Note: Recipe availability varies depending on your configuration of Aivia. Go to Help > About to find out what modules are included with your copy of Aivia.
After selecting a recipe, the main Recipe Console window will refresh to display the relevant recipe interface.
|
| Full list of Aivia recipes |

Adjust recipe settings
Select recipe presets
Each recipe comes with several preset groups with four options prominently displayed. The Low, Medium, and High buttons are pre-configured with gradated parameter values to help you get started. The fourth button is for Custom settings and is automatically activated when you make changes to the recipe parameters.
|
| Recipe presets (collapsed) |

Each preset option is linked to one or more recipe parameters. To show the parameters, click on the Expand button ![]() to expand the group. To collapse the parameters, click on the button again.
to expand the group. To collapse the parameters, click on the button again.
|
| Recipe presets (expanded) |

Load recipe settings
If you have recipe analysis results that were previously generated by Aivia, you can replicate the analysis directly by loading the recipe settings from the image or from a file. There are two ways to load recipe settings onto a recipe in the Recipe Console:
- Load settings from an existing object set
- Load settings from a file
When an image with an existing object set is loaded, you will see an  icon next to the object set in the Display Settings. Clicking on the icon will automatically load the recipe parameters used for generating the object set. If regions of interest (ROIs) were used for generating the object set, the settings that were used for each ROI will be loaded into the respective ROIs. The ROIs that were used will also be selected, and the ROIs that were not used will be deselected.
To load the settings from a file, you will need to have saved recipe settings in an XML file. Click on the icon on the toolbar in the Recipe Console to launch the File Open dialog to select the XML file to load.
Adjust recipe parameters
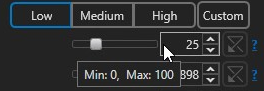
When the recipe presets are expanded, you can adjust the individual parameters associated with each preset group. There are three ways to modify a recipe parameter:
- Click-and-drag the parameter slider
- Type in a number in the numeric textbox
- Click on the up or down button on the numeric textbox
Generally, entering a value in the textbox is the most precise method for entering a specific value; you can then use the up and down buttons for fine adjustments.
Each parameter has a pre-defined range of valid values. You can find out about the value range by hovering the cursor over an individual parameter. If you input a value that is outside the range of valid values, Aivia will automatically set the value to either the minimum or maximum value in the range, whichever value is closer to the input value.
You can revert the parameter value to its previously saved value by clicking on the Revert button  to the right of the parameter textbox.
You can find an explanation of the recipe parameters in this Wiki or by clicking on the question mark (?) to the right of the parameter textbox.
Change processing function
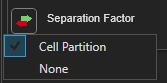
Some recipe presets allow you to switch to an alternate processing function. These alternative processing functions are often associated with certain parameters in the recipe and are indicated by the Switch icon ![]() . When you click on the icon, a pop-up menu will appear listing the available processing functions. The current function is indicated with a check mark next to the function name. Click on a different function to switch processing functions.
. When you click on the icon, a pop-up menu will appear listing the available processing functions. The current function is indicated with a check mark next to the function name. Click on a different function to switch processing functions.
Certain recipes let you skip a processing function. When you choose to skip a processing function, the parameters that are associated with the skipped function will be disabled. The disabled parameters will be grayed out, and you will not be able to enter parameter values for them.
|
| Switchable function example |
Run recipe analysis
Select input and output
You can show the input and output locations for recipes by clicking on the Expand icon ![]() next to the Input and Output section in the displayed recipe. Click on the dropdown menus to select the desired input channel and output object sets.
next to the Input and Output section in the displayed recipe. Click on the dropdown menus to select the desired input channel and output object sets.
|
| Input and Output section (fully expanded) in the Recipe Console |

By default, when you select a new recipe, the output is set to the <Create Object Group> option to create a new object group as output. However, if you have existing object groups of the same type on the image, you may choose an existing object group and overwrite the objects in the selected set.
You can further expand the Input and Output section by clicking on the Expand icon ![]() in the Components section to see the full list of output object sets associated with the recipe.
in the Components section to see the full list of output object sets associated with the recipe.
Some recipes provide you with the option to hide certain outputs if desired. The outputs that could be hidden have checkboxes next to them. If you uncheck a box, the recipe will hide the selected output; however, this will not affect recipe processing.
For images that have more than one z-plane, you may preview and/or obtain recipe results for regions of interest (ROIs). A table of ROIs is located at the bottom of the Input and Output section when ROIs may be used. Click on the Expand icon ![]() in the top-left corner of the Regions Of Interest Table to expand the table, which has options for you to add, remove, select, and otherwise manage ROIs.
in the top-left corner of the Regions Of Interest Table to expand the table, which has options for you to add, remove, select, and otherwise manage ROIs.
Use regions of interest
To show/hide all ROIs, click on the Show/Hide ROIs icon  /
/  in the top row of the Regions Of Interest Table.
If you have not created any ROIs, Aivia will automatically generate a box ROI in the center of the image; you may manipulate the size and position of this box ROI by selecting it in the Image Viewer and clicking-and-dragging the red circles/spheres.
You may add ROIs in three ways:
- Click on the Add Box ROI icon
to add a box ROI with an automatically generated (though changeable) size and position.
- Click on the Load Mesh ROI icon
- Click on the Create ROIs from Selected Meshes icon
Double-click the name of an ROI in the Regions Of Interest Table to enable editing of the name. Click on the Remove icon  in any ROI's row of the Regions Of Interest Table to remove that ROI.
Select the ROIs you would like to process using the checkboxes in the table; the topmost checkbox (de)selects all ROIs. If any ROIs are selected, recipe previews and results are generated only for the selected ROIs. Previews of recipe results for ROIs are generated using the recipe settings that are in the Recipe Console; however, if any recipe settings are stored in an ROI, those settings are used for that ROI when the recipe is applied. You may use different recipe settings for different ROIs when applying a recipe, but overlapping ROIs must have the same recipe settings.
Store the recipe settings that are shown in the Recipe Console into an ROI by clicking on the Store icon in the ROI's row in the Regions Of Interest Table.
Click on the Restore icon in an ROI's row to load the settings that were stored in that ROI into the Recipe Console.
Please see the Regions of Interest page for more information about using ROIs.
Preview recipe results
Some recipe presets allow you to get a preview of the intermediate recipe results. Previewable steps are indicated with a magnifier glass icon  that also serves as the toggle button for the function. When you click on the icon, the Recipe Console will apply the recipe to the current image up to the specified preset group and show the intermediate results.
Depending on the preset group previewed, you may see a channel, an outline or both. You can toggle the display of these previews using the Display Settings. The preview output are indicated with a (Preview) suffix in the Display Settings. By default, preview channels are toggled off while outlines are toggled on.
Apply recipe
When you are satisfied with the parameter settings, you can apply the recipe by clicking on one of the apply options in the lower right corner of the Recipe Console. If you are applying the recipe on the image from the beginning, you will be presented with two options:

- Start: applies the recipe to the full image sequence from the first image or time frame
- Step: applies the recipe to a single time frame
When you have started recipe apply, processing status is indicated in the Recipe Console next to the apply buttons. Recipe results on the processed frame will be displayed in the Image Viewer. The recipe apply progress is indicated with a red bar above the processed frame in the T/Z bar. Furthermore, you will also be able to temporarily pause recipe apply by clicking on the now-enabled Pause button.

While recipe processing is paused, you will be able to modify the recipe parameters in the Recipe Console. When you are ready to proceed, you will have three apply options.

- Restart: restarts recipe apply to the full sequence from the beginning, removing any processed data
- Continue: resumes recipe apply from the current frame
- Step: applies the recipe to the next time frame
When the recipe has been applied to the full image sequence, the status message "Processing Completed" will appear to the left of the apply buttons.
Measurements on the recipe detection are generated asynchronously, and progress is indicated in the lower right corner of Aivia's window. If you have a large image containing lots of objects, measurement calculation may persist after the recipe has finished applying. You may continue to use Aivia as usual while measurements are being calculated; however, please note that measurement data may be incomplete and not appear in the Spreadsheet or Charts until all the measurements are calculated.
Save recipe
There are several ways of saving the changes you have made to a recipe.
Export recipe to a file
You can export the recipe as a .recipe file by going to File > Export > Recipe from the top menu or clicking on the Save recipe icon to open the File Save dialog to save the recipe.
Save parameters to presets
You can save the custom parameters you used into one of the three preset buttons. Right-click on the preset button you wish to save the parameter value(s) to and select the Save Current Settings option from the context menu.
After saving the settings to the desired preset, make sure you also save the recipe to store the changes you have made to the recipe.
Save recipe settings to a file
You can save the recipe to an XML file that can be loaded into Aivia by clicking on the Save Recipe Settings icon  from the Recipe Console toolbar. This will save the recipe settings as well as any changes made to the switchable operating procedures to a text file in XML format.
Additionally, the recipe settings used for generating an object set during recipe apply are saved when the image is saved.
|
| Preset button context menu |
