The Mesh Spot One Click Object Creator lets you build generate 3D mesh surfaces based on at selected locations. Mesh surfaces created with the Mesh Spot One Click Object Creator may be used for the following and more: to obtain measurements for 3D objects, to augment the output sets of recipes such as 3D Object Analysis - Meshes/Spots, to use as regions of interest (ROIs) for recipe application, and/or to use as objects for classification with the Object Classifier.
Interface
The Mesh Spot One Click Object Creator is one of eight tools found in the 3D Tools tab in the Analysis Panel. Go to 3D View or 3D Plane View to show the 3D Tools tab. Click on the 3D Tools tab, and then click on the Mesh Spot Creator icon One Click Object Creator icon to launch the tool. The Mesh Spot The One Click Object Creator interface is shown below.
|
| Mesh Spot Creator GUI
|
| One Click Object Creator GUI |


When you launch the Mesh Spot One Click Object Creator, all image channels are hidden except the topmost channel in the Channel Settings panel; this is because the Mesh Spot the One Click Object Creator uses a single image channel when creating a mesh surface. You may choose which channel to show and, therefore, use for generating a mesh surface once you are in the tool.
| Panel | ||||
|---|---|---|---|---|
On this page:
|
Tool options and functions
| Name | Icon | Description |
|---|---|---|
| Pick Location |
| Toggles the ability to select a location in the image that will serve as the center of the search region for a mesh surface |
| Search Radius |
| Allows you to specify the maximum detection radius from the selected point for mesh surface creation |
| Select Output Set |
| Allows you to select the object set that the newly created mesh surface will be output to |
| Smooth |
| Toggles smoothing of the mesh surface |
| Create Mesh |
| Creates the mesh surface that is closest to the selected location and both detected within and bounded by the search region |


Using
the One Click Object Creator
To launch the
One Click Object Creator, click on the 3D Tools tab in the Analysis Panel
and select the
One Click Object Creator from the 3D Tools toolbar. This
opens the One Click Object Creator interface.
The One Click Object Creator creates a mesh based on a single image channel, so it is strongly recommended that you only have one channel visible when you are picking a location and creating a mesh. Show or hide different image channels by clicking the Toggle Visibility icons
next to the channel names in the Channel Settings panel. You may also
need to adjust the lookup table (LUT) in the
Channel Settings to create the desired mesh surfaces
as the algorithm used for generating mesh surfaces depends on the intensity/opacity of structures in the image.
Pick a location
To choose the center of the search region for a mesh surface, click on Pick Location (or press C on your keyboard) so that the icon becomes outlined in blue
and then click on the desired location in the image. It is best, in general, to pick a location that is near the edge of the object (or near the edge of the desired surface). Once a location is selected, a mesh preview is shown. The preview may contain multiple surfaces, though only one mesh surface is generated when Create Mesh is clicked (or when Shift + C is pressed on your keyboard).
| Tip |
|---|
Hold down |
creation. |
Adjust the search radius
Drag the Search Radius slider to change the maximum detection radius (from the selected location) to be used for creating a mesh surface. The mesh surface that is created is detected within and bounded by the search region.
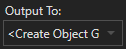
Choose the output set
Click in the Select Output Set box to expand the menu for selecting the object set to output the new mesh surface to. Only object sets of the appropriate type (
not neuron object sets, cell object sets
, or outline sets) are available for selection.
Choose <Create Object Group> in the
menu to add the created mesh surface to a new object set.
Toggle mesh smoothing
Click the Smooth icon so that it is outlined in blue for smoothing to be applied to the mesh surface during mesh creation.
Create a mesh surface
Click the Create Mesh button (or press Shift + C on your keyboard) to generate the mesh surface that is closest to the selected location and is both detected within and bounded by the search region, as defined by the chosen location and search radius. The Create Mesh option is only available when Pick Location is toggled on.
 |  |  |
One object without a mesh surface | Selected location (purple) and preview (gray) | Created mesh surface (green) |
Image credits
Philipp Keller, Howard Hughes Medical Institute, Janelia Farms Research Campus, Ashburn VA; Cell Tracking Challenge, http://www.celltrackingchallenge.net/datasets.html
Related articles
| Filter by label (Content by label) | ||||||||
|---|---|---|---|---|---|---|---|---|
|
| Page Properties | ||
|---|---|---|
| ||
|