Step-by-step guide
| Info |
|---|
This tutorial uses automatic workflow creation from an object group, but workflows can also be manually defined or created from recent actions. Please see the Workflow Processor page for more details. |
Before beginning the tutorial, please download the Nuclei Count Demo Images (NucleiCountDemo.zip). This tutorial uses the Nuclei Count recipe. Please refer to the documentation on the Nuclei Count recipe for more information about the recipe.
1. Unzip the demo file. There should be five
images total.
2. Load one
of the images into Aivia.
3. In the Recipe Console, click on the Recipe selection dropdown menu and select the Nuclei Count recipe.
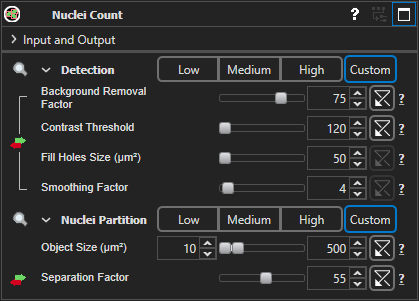
4. Set the recipe parameters as shown below.
5. Click the Start button or
press the F4 key on your keyboard to apply the recipe.

5. Go to the Analysis menu and select Batch & Cloud Processor; this launches the Batch & Cloud Processor window.
6. In the Create Job tab of the Batch & Cloud Processor, select Recipe mode.

7. In the dropdown menu next to the menu that has Recipe Apply selected, select the Nuclei Count recipe.

| Info |
|---|
The alternative to Recipe Apply is Template Apply. In Template Apply mode, an object group on the current image is selected instead of a recipe from the adjacent dropdown menu. The recipe and recipe settings used to generate the selected object group as well as all measurements calculated for the object group are batch applied to the input images. See the Batch Processor page for more information on Template Apply as well as how to batch apply multiple recipes at once to a set of input images. |
8. Click on the Add Local Folder button, navigate to the folder containing the unzipped demo images in the dialog that opens, and then click on Select Folder.
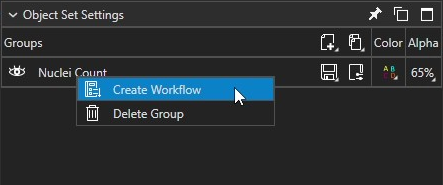
6. In the Object Set Settings panel, right-click on the created object group and choose the Create Workflow option. This creates a workflow with the analysis steps that were taken to create the object group, which in this case was applying the Nuclei Count recipe with the parameters specified in Step 4. This also launches the Workflow Processor.
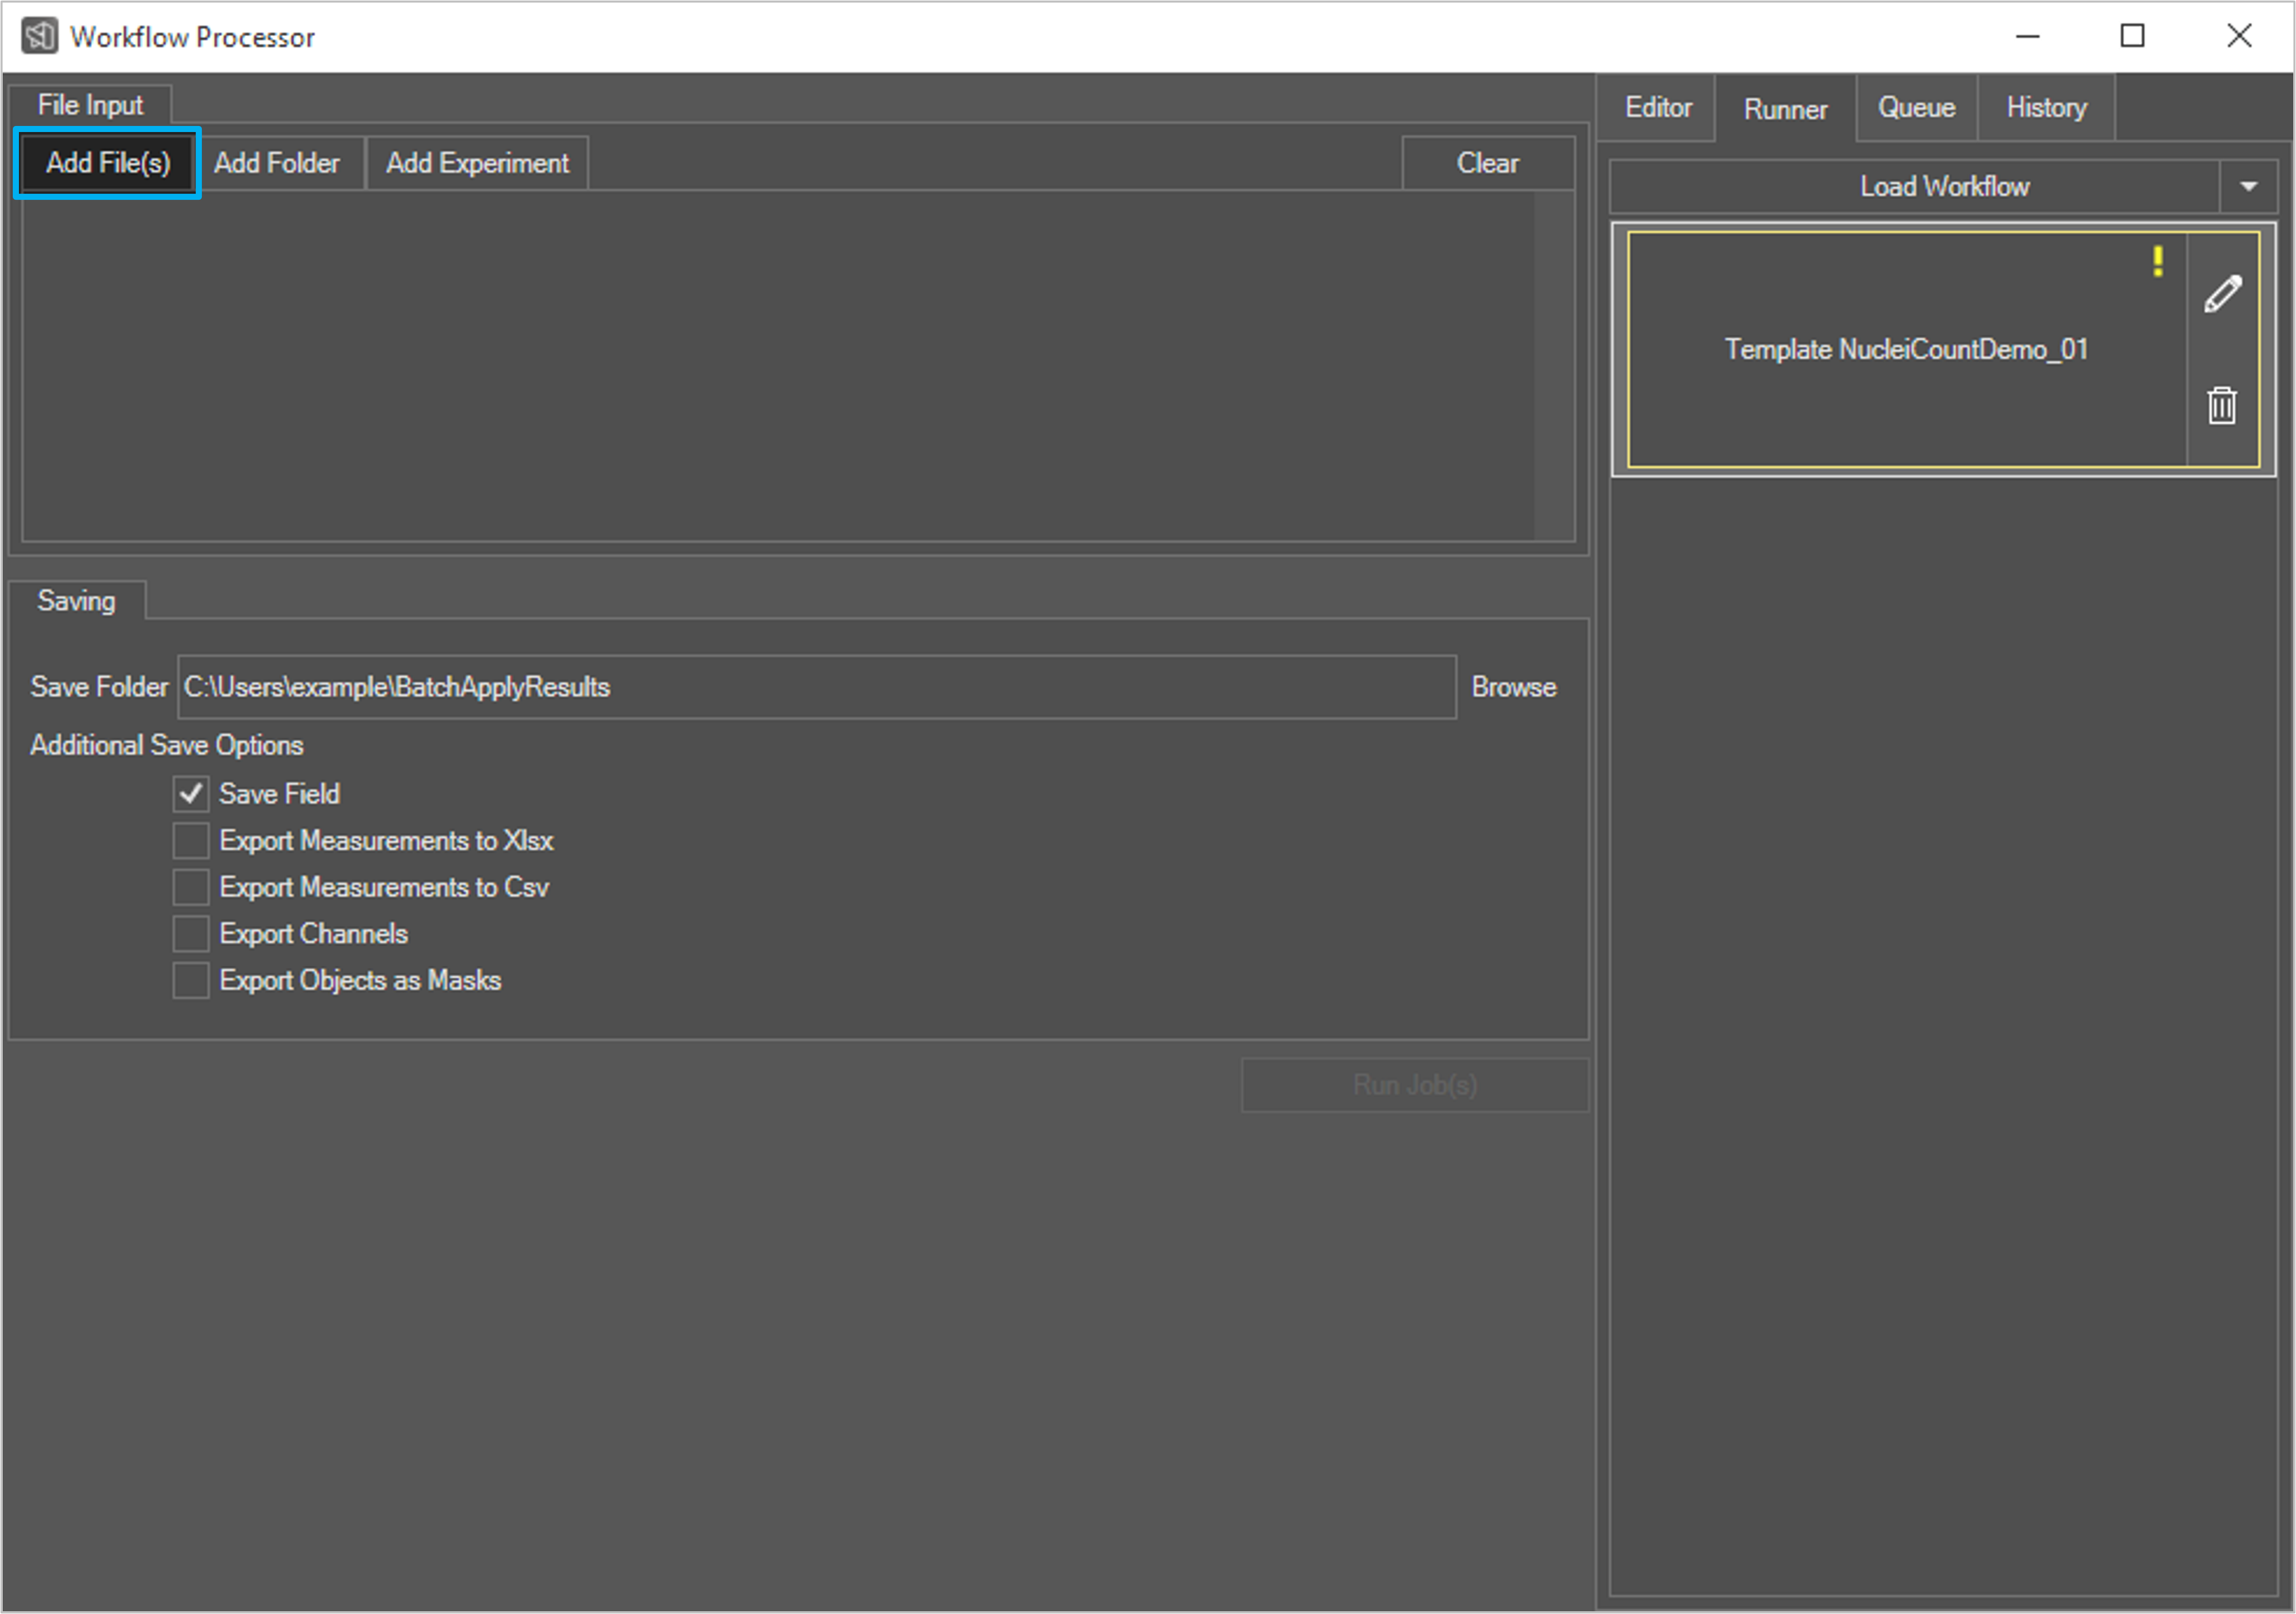
7. In the Workflow Processor window, click the Add File(s) button, navigate to the folder containing the unzipped demo images in the dialog that opens, select the five demo images, and then click Open.
| Info |
|---|
The exclamation point and yellow border around the workflow tile indicate that the workflow has not been saved to a file. To save the workflow for future use, go to the Editor tab and click the Save icon in the upper-right corner of the workflow’s tile. You can also make other modifications to the workflow in the Editor tab, such as renaming the workflow, adding additional processing steps, or changing the recipe or recipe parameters. See the Workflow Processor page for more details. |
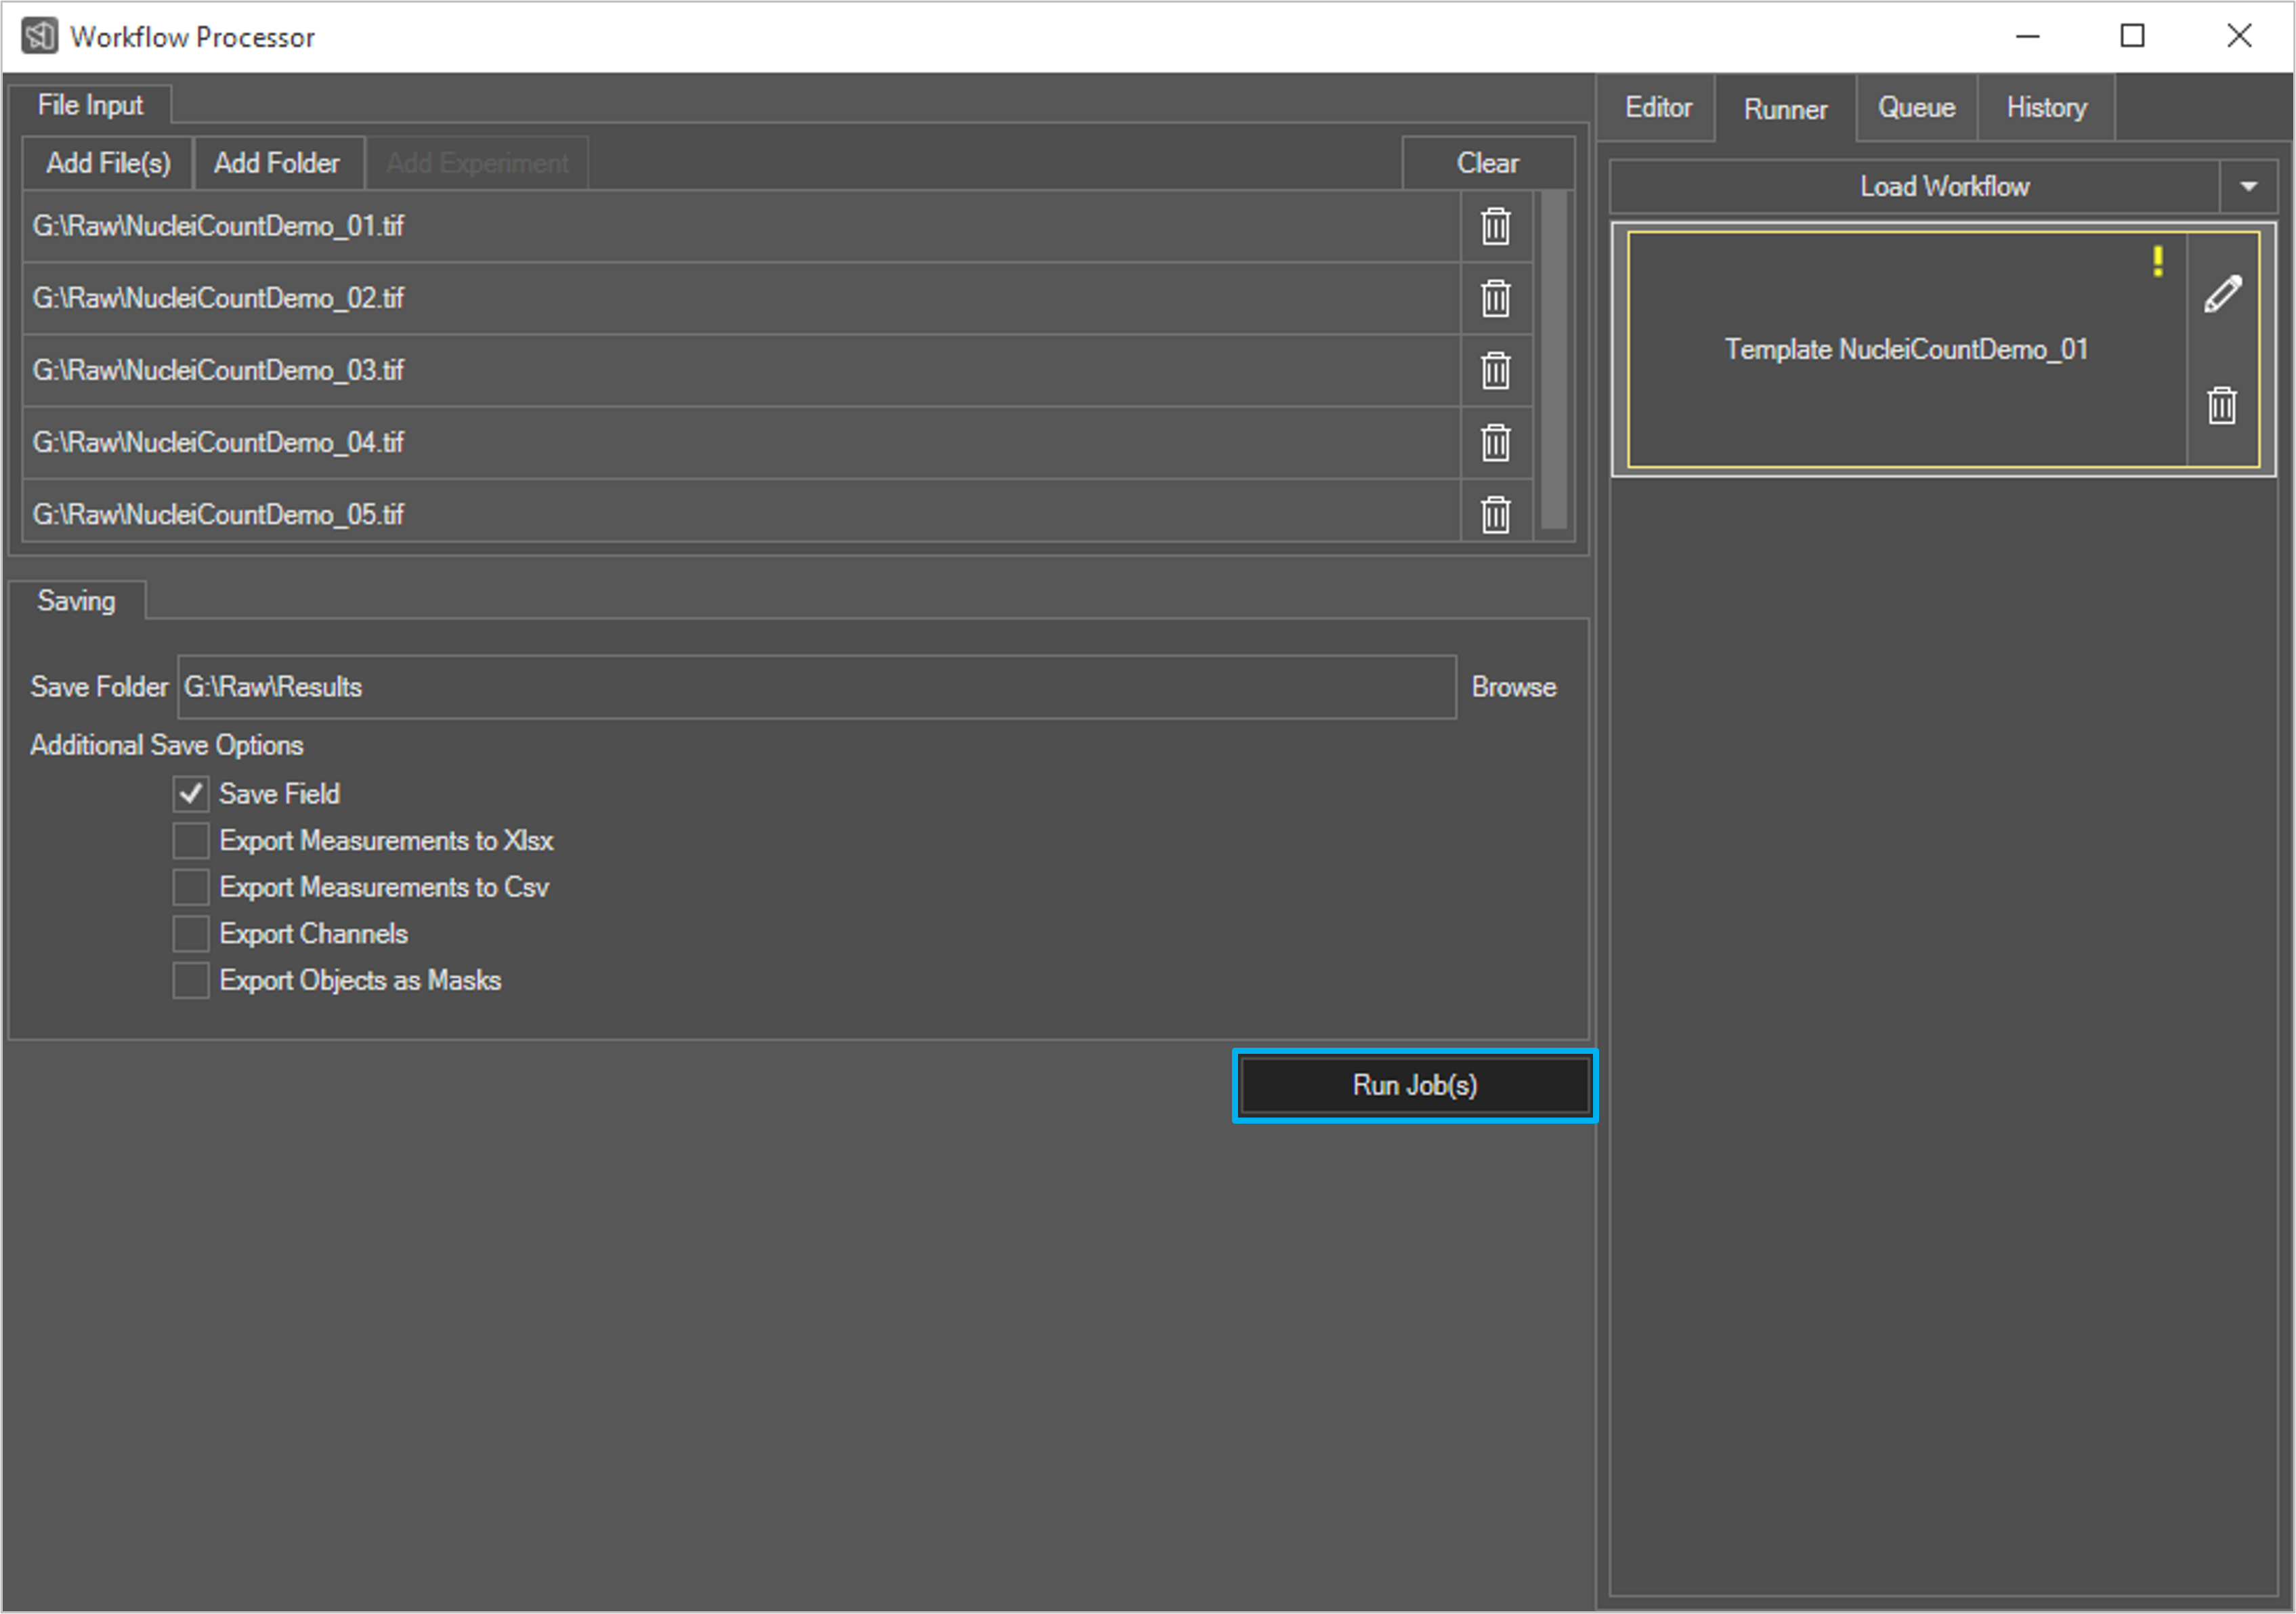
8. Click on the Browse button to the right of the
Save Folder text field, navigate to the desired output location, and then click
Select Folder.
9.

11. Click Create to start the batch process. You can monitor progress in the Progress Queue tab of the Batch & Cloud Processor window and continue to use Aivia normally while the batch process is running.

12. When processing has completed, all processed images and exported measurements are in the designated output folder. The processed images have the “_Processed” suffix, and the exported measurements have the “_PrintToExcel” suffix.
 13
13In the Additional Save Options section, check the boxes for the types of output files you would like to save. With the Save Field option, the processed images with their generated objects and measurements are saved as Aivia TIFF files.
10. Click Run Job(s) to start the workflow processing. The Queue tab of the Workflow Processor is automatically shown, displaying the job currently being processed as well as the queue of jobs waiting to be processed. Once the queue is empty, all jobs have been completed.
11. After processing is done, there is a folder within the specified save folder with the data, time, and workflow name in the title, and within that folder there is a folder for each of the input images titled “Job [#]” by default. Each “Job [#]” folder contains all outputs for one of the input images.

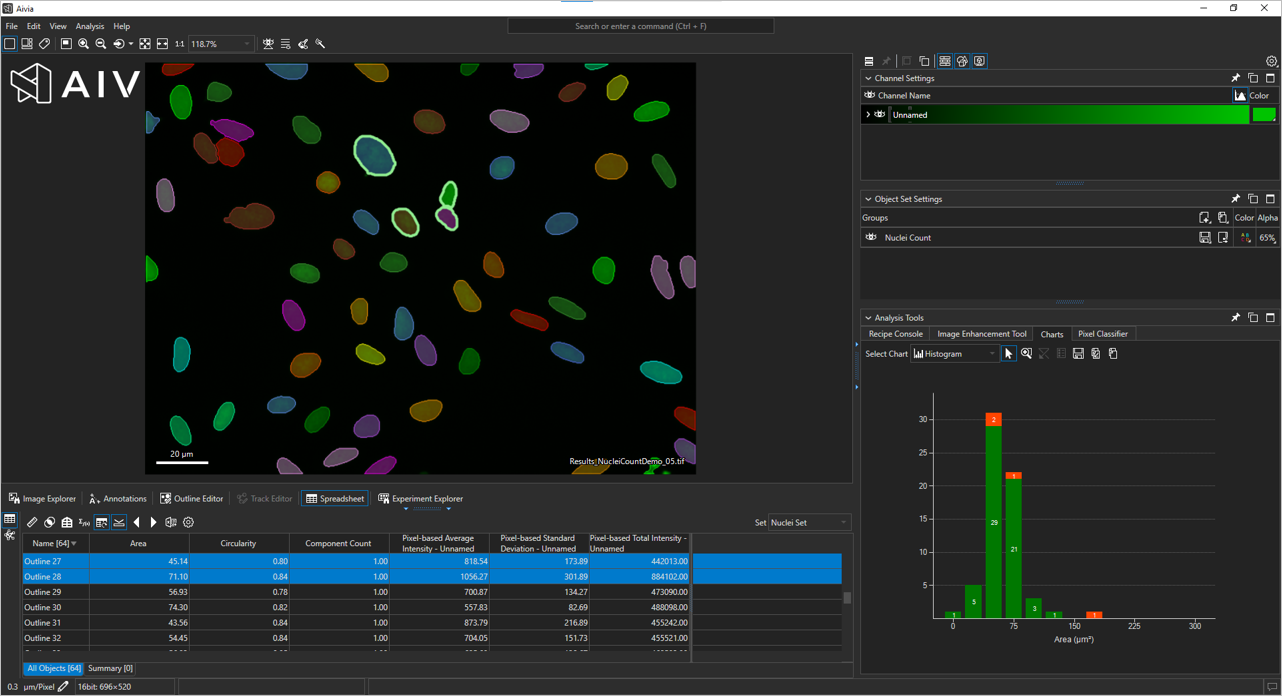
12. You can open the processed images (if the Save Field output option was used) in Aivia to view the analysis results

On this page:
toc. You may click on the Explore Results Active Tile (accessed from the search bar) to adjust the Aivia layout to one conducive to exploring analysis results.
Related articles
| Filter by label (Content by label) | ||||||||||||||||||
|---|---|---|---|---|---|---|---|---|---|---|---|---|---|---|---|---|---|---|
|
| Page Properties | ||
|---|---|---|
| ||
|