Aivia Software
How to edit tracks and lineages
Add tracks to workspace
Workspaces are used to help organize the track displays in the Track Editor with a large number of tracks and lineages. You can create a new workspace to separate a group of tracks to edit.
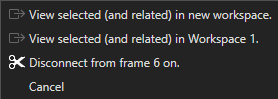
First, select a track or group of tracks by left-clicking on the colored bar representing individual tracks. Right-clicking on the Editor will bring up a context menu allowing you to move selected tracks to a new (or existing workspace). In our case below we already have created "Workspace 1". Any selected object can be moved either into a new workspace to be modified, or be added into an existing workspace.
Workspaces act as a reference to the original objects, thus editing an object in "Workspace 1" will also edit the same object in the "All Objects" workspace or any other workspace with those edited objects. Workspaces can be renamed or deleted by right clicking on the workspaces tab (with the exception of the "All Objects" tab.)
|
| Workspace context menu |
Draw connections
Connections
A track is a series of objects that are connected in time. Tracks appear as colored bars in the Track Editor workspace that spans the length of the timeline.
There are three ways to edit the connections in the Track Editor:
- Create new connections
- Modify existing connections
- Split a track
Additionally, a track can be in a lineage if it is connected to other tracks. An example of a lineage is shown on the right. The parent track (orange) is in a lineage with Tracks 16 (green) and 24 (blue).
It is possible to have two or more children attached to a single parent track. The line connecting the parent to the child will share the same color as the child track; while the circle at the start of the child track will reference the color of the parent track.
In the case of lineages, the interactions for editing the connections are the same as editing a track on its own.
 |
| Example of a lineage |
Create new connections
A new connection can be made at any point in the lifespan of a track. Left-click on the track and drag your cursor to a new location will show a dot where the connection begins as well as a dot indicating the position of your cursor.
The dot for the cursor location is also an indicator for valid connections:
- A green dot indicates the connection is valid; release your mouse button to create the connection
- A red dot indicates the connection is invalid
Merge tracks
Creating an end-on-end connection between two tracks (i.e. from the terminus of one track to the start of another track on the next time point) will merge the tracks together to create a single track.
Create lineages
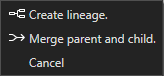
An example of a possible lineage connection is shown on the right, where a connection could be made between the orange track and the yellow track. If there is more than one available actions, the user will be presented with options to choose from, as shown on the right. The three options are:
- Create lineage: splits the original track at the specified time point and create a lineage with the remnant of the original track and the connected track as children tracks
- Merge parent and child: splits the original track at the specified time point and join the track to the start of the connected track
- Cancel: cancels the operation; no edits will be made
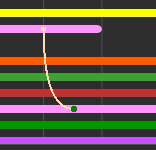 |
| Creating a new connection. |