Aivia Software
Video animator
The Video Animator lets you create and export a 3D flythrough video from Aivia. You can define specific camera locations and display settings, called a keyframe, in the tool and the software will automatically interpolate the optimal path to the next keyframe.
Interface
The Video Animator can be found in the Contents Panel at the bottom of the Aivia window. To launch the tool, make sure you are in 3D View mode and then click on the Video Animator  icon.
icon.
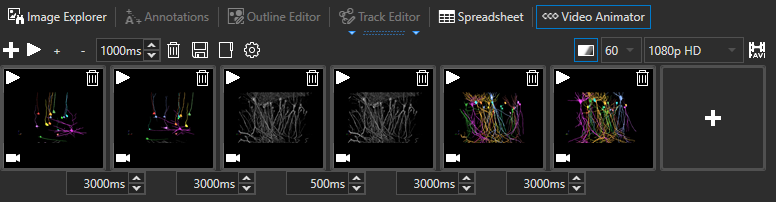
The Video Animator can be broken down into two sections: toolbar and keyframe display.
- Toolbar: controls for keyframe creation and export
- Video timeline: shows a thumbnail of the added keyframe (i.e. camera locations and display settings) and timeline
On this page:
|
| Video animator GUI |
Toolbar
The toolbar is the main method for interaction in the Video Animator. It is located at the top of the Video Animator section. The options for adding or modifying keyframes and exporting the results can be found here and summarized in the table below:
| Name | Icon | Description |
|---|---|---|
| Add frame |
| Adds a new keyframe on the video timeline based on the current display |
| Preview |
| Plays a preview of the entire video animation |
| Modify transition times |
| You can modify the transition time of all keyframes by clicking the + button to add, the - button to subtract a specified length of transition time between keyframes based on the time textbox on the right |
| Clear all frames |
| Removes all keyframes from the video timeline |
| Options |
| Opens the Option window for the Video Animator that lets you adjust the relative size and location of the Aivia watermark and add a custom watermark |
| Blend |
| Toggles blending between keyframes to create smoother, or less abrupt, transitions with cross-fading between visible layers. This may cause a mild slowdown during export as additional processing is required to generate the blended frames |
| FPS selector |
| Specifies the frame rate of the exported movie; there are five (5) options, measured in frames per second (FPS):
|
| Resolution |
| Sets the resolution of the exported video; there are five (5) options:
|
| Export video |
| Exports the video to file based on the video timeline with the defined FPS and resolution settings |


Video timeline
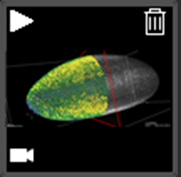
The video timeline shows a thumbnail of all the added keyframes. You can also modify the displayed keyframes and transition time between the keyframes in this section. Each added keyframe is presented by a thumbnail on the timeline, there are three tools that are overlaid on the thumbnail:
| Name | Icon | Description |
|---|---|---|
| Play from current frame |  | Plays a preview of the video animation, starting from the selected frame |
| Remove selected frame |
| Deletes the selected keyframe from the video timeline |
| Replace selected frame |
| Replaces the selected keyframe with the current display |

|
| Keyframe thumbnail |
Related articles