Aivia Software
Image Stitcher
The Interface
The Image Stitcher can be found in the File Menu by going to File>>Import>>Stitched Image. When you open the Image Stitcher, the previous parameter and layout settings used to stitch will be restored. If you've never stitched an image before, the default settings will be used.
The main Image Stitcher UI can be found on the right. The section on the left lists the images you have loaded to be stitched, whereas the section on the right is where you specify how the image was acquired. A preview is given of the current layout settings you have for the images you have loaded.
|
| Image Stitcher UI |
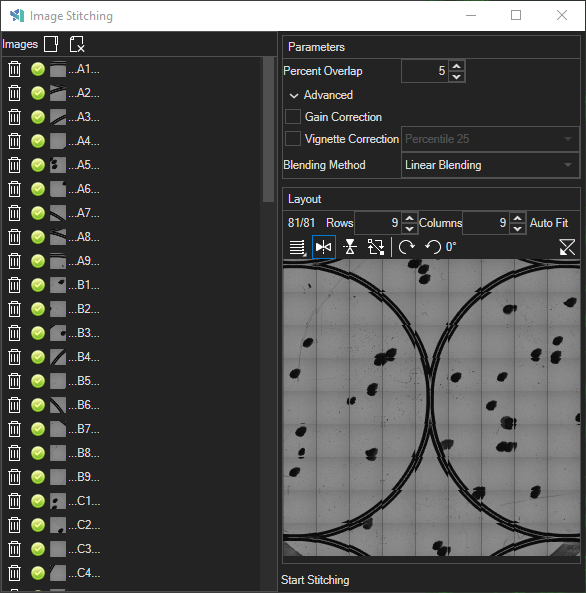
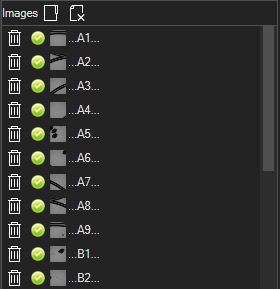
Image List
This lets you select the images you're going to stitch together. You can load images using the "Load Images" button  , or simply drag and drop. As soon as you have done so, the images will start loading into the program, giving you a preview thumbnail as they do.
|
| Image List |
Parameters Panel
Here you specify the parameters for the stitching algorithm.
|
| Parameters Panel |
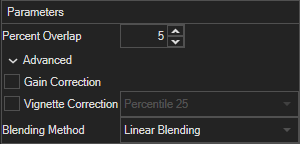
Percent Overlap
The percentage of the fovs that overlaps from the acquisition method.
Gain Correction
This option fixes the issue where the overall brightness/gain of each tile is slightly different, such as one corner of the stitched image may be brighter than the rest. This functionality first estimates the gain for each of the tiles and then corrects all tiles to create a stitched image with flatter illumination.
Vignette Correction
This option fixes the issue where individual tiles are slightly dimmer at the edges of each tile due the illumination at the center of the image. See a few examples of this issue: https://en.wikipedia.org/wiki/Vignetting
To correct vignetting, first the general background illumination for the microscope is determined by looking at all of the images as a whole/stack and measuring each pixel position across all tiles. Looking at each pixel across all tiles, the statistic you select is used to estimate the background that is effective at ignoring the tile specific content:
- Median: The median intensity value at each pixel location is considered the background.
- Percentile 25: The 25th intensity percentile value is considered the background.
- Min Value: The minimum value at each pixel location is considered the background.
- Max Value: The maximum value at each pixel location is considered the background.
Choosing the correct statistic for the background estimation depends on the image content, percentile 25 works well most of the time.
Once the background of the intensity image is estimated, the inverse of the background image is applied to each tile to flatten the intensity of the individual tiles.
Blending Method
The blending method determines what intensity value the algorithm should output when two or more tiles overlap. For most circumstances linear blending should be used.
- Linear Blending: The value of each pixel in the overlap region is a weighted sum where the pixels in the overlap region are inversely weighted by their distance to the center of each image. For example, if a pixel in an overlap area is closer to the center of image A, and further away from the center of image B, it will be weighted higher for image A since it is closer to the center of image A.
- Average Blending: The value of each pixel in the overlap is averaged over all images (that create the overlap) with equal weighting.
- Overlap Blending: No blending is performed and the pixels of the final stitching are set based upon column-row order of the tiles. A pixel in the final stitching is set by the last tile in a row to overlap that pixel.
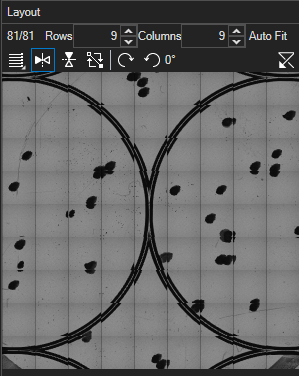
Layout Panel
Here you specify the general layout of the stitched image.
Rows and Columns
Let's you specify how many tiles make up the full image. You can click the "Auto Fit" button to do a best guess fit.
| Icon | Name | Useage |
|---|---|---|
| Pattern | Let's you specify the general acquisition pattern.
|
| Flip Horizontal | Flips the layout horizontally. |
| Flip Vertical | Flips the layout vertically. |
| Flip Start And End Points | Flips the layout starting from the end point and goes in reverse instead. |
| Rotate Clockwise | Rotates the layout clockwise. |
| Rotate Counter Clockwise | Rotates the layout counter clockwise. |
| Reset Layout | Resets the layout to the default settings. |


You will get a preview of what the general layout will look like using the images you have currently loaded.
|
| Layout Panel |