Aivia Software
Object Set Settings
Object Set Settings is one (1) of the four (4) display settings sections. This section lets you adjust the appearance of each object set, as well as any additional overlay options, on the currently displayed image. The adjustments applied here only change how the image is shown in the Image Viewer and do not change the underlying data on the image.
Interface
The Object Set Settings panel is found in a column to the right of the Image Viewer below the Channel Settings by default. Each table row contains controls that applies to a particular object set or group. The object group display can look different for different types of objects.
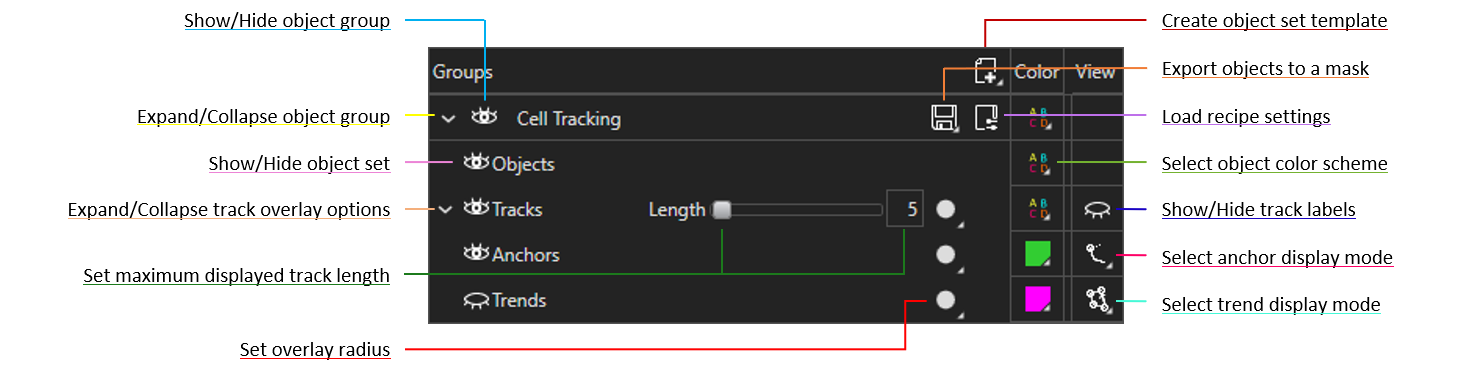
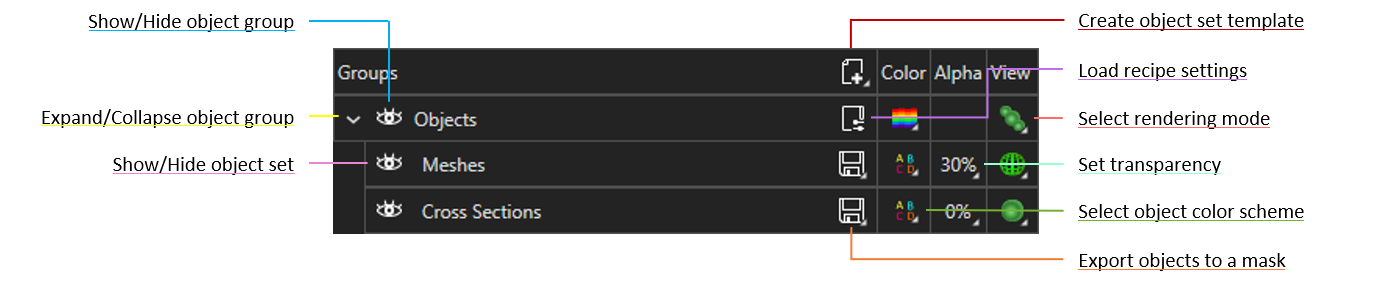
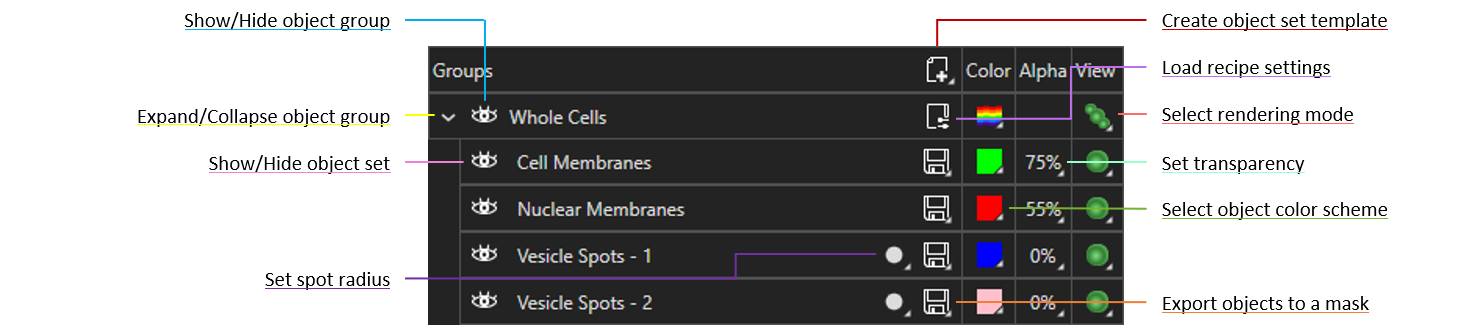
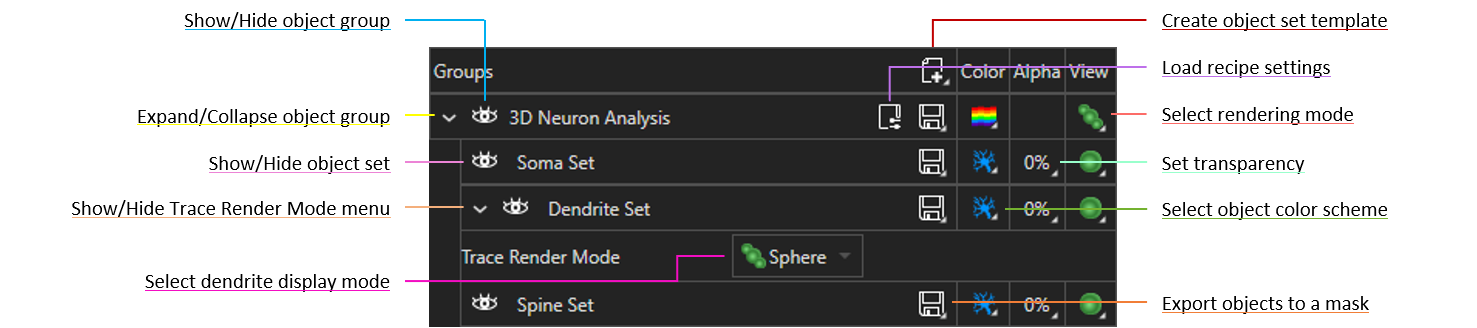
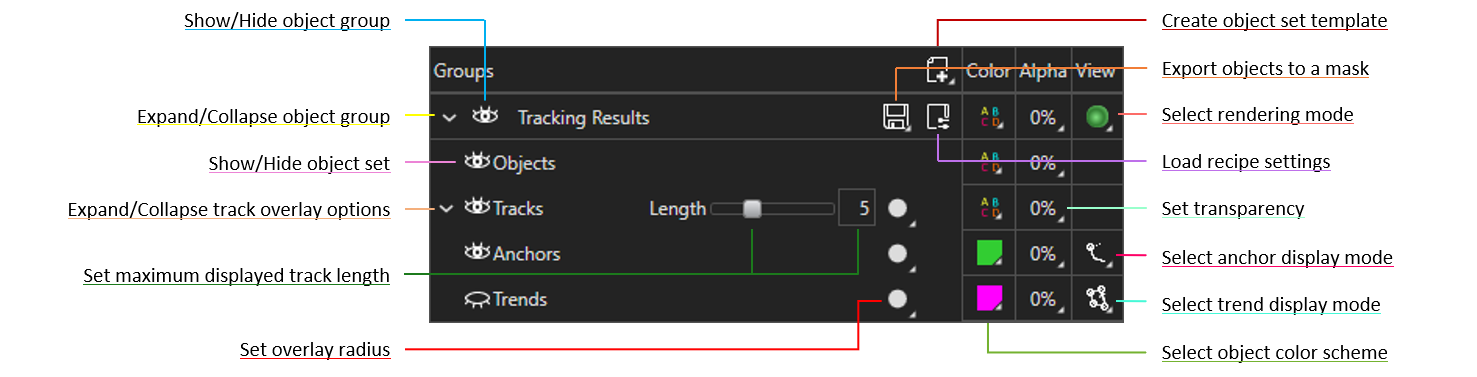
Object group display
Below are examples of object group displays for different types of objects.

On this page:
Buttons
The Create Object Set Template button  in the Object Set Settings table header opens a menu from which you can select to create an empty outline, mesh, or neuron set. You may choose to add objects created with the Outline Editor or 3D Tools to these sets, for example.
Each table row in the Object Set Settings panel represents a single object set on the displayed image. Each row can be controlled independently to adjust the display settings of each object set. There are six (6) basic controls for nearly every object set:
| Name | Icon | Description |
|---|---|---|
| Toggle Visibility |
| Shows or hides the object set from view |
| Load Recipe Settings |
| Loads the recipe settings and parameters used to generate this object set into the Recipe Console |
| Export Objects to a Mask |
| Exports the objects to a mask; typical export options include the following:
This button can also be used to export neuron groups to an Aivia-specific format. |
| Select Object Color Scheme |
| Specifies the coloring mode for the object set |
| Set Transparency |
| Specifies the percent transparency of the object set in 3D View |
| Select Rendering Mode |
| Specifies the rendering mode of the object set in 3D View; the available options are the following:
|


Additional controls that are specific to particular object types are summarized in the table below.
| Object Type | Name | Icon | Description |
|---|---|---|---|
| Dendrites | Select Dendrite Display Mode |
| Specifies the display style for dendrite display, there are three (3) options:
|
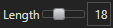
| Tracks, Spots | Set Overlay Radius |
| Specifies the radius of the overlay display; this can be applied to tracks, anchors, trends, and spots |
| Tracks | Set Track Length |
| Specifies the number of frames to display with the track overlay; a longer track length may result in reduced performance |
| Show/Hide Track Labels |
| Shows/Hides track labels in Main View (2D) | |
| Select Anchor Display Mode |
| Specifies the display style of the anchor overlay; there are two (2) options:
| |
| Set Trend Display Mode |
| Specifies the display style of the trend overlay; there are three (3) options:
|


Using the Object Set Settings
The Object Set Settings panel is active whenever you have an image loaded in Aivia. The software automatically populates the table based on the object sets and object types that are in the image file, if there are any.
Object sets can be organized into groups. Controls in a group row of of the Object Set Settings table often affect the settings for each object set in the group. The names of object groups and several types of object sets can be edited after their names are double-clicked in the Object Set Settings table.
Set display visibility
Each object set can be shown or hidden separately with the Toggle Visibility icon to the left of its name. The icon has two states:
| Display State | Icon | Description |
|---|---|---|
| Shown |
| The associated item is visible; click on the icon to hide the associated item |
| Hidden |
| The associated item is not visible; click on the icon to show the associated item |

For object groups, you can show or hide every object set and overlay in the group with the Toggle Visibility icon in the object group row.
Specify object display options that are unique to object types
The options available for displaying object sets and overlays depend on the object types. Please refer to the following pages for more information:
Change object set color
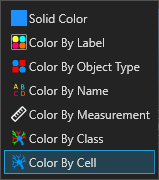
You can change the object set color display by clicking on the icon (or colored rectangle) associated with the object set in the Color column. Clicking on the icon will bring up a color picker menu which allows you to specify a different color or different coloring mode. There are seven (7) coloring options:
- Solid color applies the same color to every object in the group
- Color by label applies a different color to each object depending on their object label
- Color by object type applies the same color to the same type of object (e.g. meshes, dendrites, spines)
- Color by name applies a different color to each object depending on the name of the object
- Color by measurements applies a different color to each object depending on its value for a specified measurement
- Color by class applies the same color to objects that belong to the same classification group
- Color by cell is specific to neuron and whole-cell objects and applies a different color for each neuron or whole cell
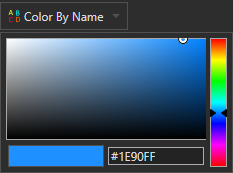
When you click on the icon in the Color column, the coloring option selector appears (see right). To change the coloring type, click on the dropdown menu in the selector.
You can also apply a specific color using the color picker below the dropdown menu. Click or drag the slider on the right to specify the desired hue (color) and click anywhere on the main display to specify the saturation and brightness desired. Alternately, you can specify a color by entering the hexadecimal color code in the textbox below the main display.
|
| Object color options |
|
| Coloring option selector |
Color objects by measurements
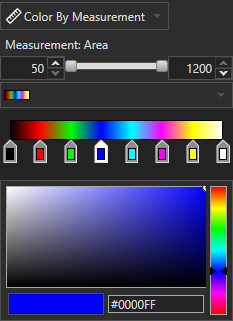
When you select the Color By Measurement option, a different coloring selector appears. You can specify the measurement you want to use as well as the color palette and measurement range. The Color By Measurement selector is shown on the right.
Click on Measurement to open a dropdown menu listing all the available measurements that can be used for this coloring mode. Click on a measurement name to select the measurement.
The minimum and maximum values are shown in the slider below the measurement selector. The values are automatically populated based on the minimum and maximum object measurements on the image. You can drag the slider to define the desired value range to color.
Below the value slider is the color palette selector, where you can specify a color gradient for coloring the measurements. Additionally, you can adjust the gradient by dragging each of the color markers or change the color using the color picker below.
|
| Color By Measurement selector |